Looking for a DIY project that doubles as an awesome last-minute gift?
Try out these Essential Oil Wax Melts! These aromatic melts work in most wax burners and fill any room with the delightful aroma of essential oils. They’re a snap to make, easy to customize with your favorite oils, they makes wonderfully thoughtful gifts for loved ones or just add a nice scent to your home!
Check out the step-by-step DIY below and be sure to let us know how yours turned out in the comments!
What You’ll Need
- 2 ounces Beeswax, white or yellow
- 2 tablespoons Coconut Oil
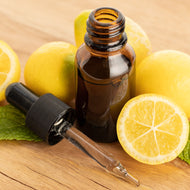
- 15-20 drops Essential Oil(s) your preference
- 1-2 drops color wax dye (optional)
- Silicone molds
- Double boiler
Step 1
Create your double boiler. If you don’t have one, you can make one simply with a pot and glass measuring cup. Fill your pot with just enough water to touch the bottom of the glass measuring cup, but not so much that it spills over.
Add your beeswax and coconut oil to the glass measuring cup and turn on burner to medium heat. Stir as the wax and oil melts and combines.
Step 2
Once wax and oil has completely melted, remove from heat and add essential oil(s) and any dyes. Stir well to combine. Carefully pour the mixture into molds, making sure not to splash the wax over the edges.
Step 3
Let molds cool–it should take around 3-4 hours before completely cooled and hardened. Pop from the molds, and you’re done!
PipingRock Empowering Your Health Journey